Monday, 12 April 2010

Exhaust, Dashboard and more loom labelling!

Sun 11th Apr 2010 - Work time = 6hrs ... Build Time To Date = 171hrs
With all the engine bits done time to install the exhaust.  It was a nice sunny day so I wheeled the car outside and tidied up the garage again (Sandra muttered something about why I was hovering the garage when the lounge needed cleaning?).
Fitting the exhaust was pretty straightforward ... all the pipes slotted together quite easy. After the IVA test I think I will remove the heat shield as I don't like the cheese grater look ...the silencer is on the passenger side so I won't burn my legs getting in and out!


Next to the dashboard ... I drilled the dashboard blank first and then set about fitting all the gauges and switches.  I realised that the heated screen switch was missing ... another call to parts department.


Armed with my Dymo Labeller I then set about labelling all the loom connections with some permanent labels ... figured it would be easier to id cables once they were installed and in case I needed to remove the dash in the future.  Here's the spaghetti ready for the dash to go in ... next weekends' job.

Coolant Hoses ... time for some pipe bending!

Sat 10th Apr 2010 - Work time = 7.5hrs... Build Time To Date = 165hrs
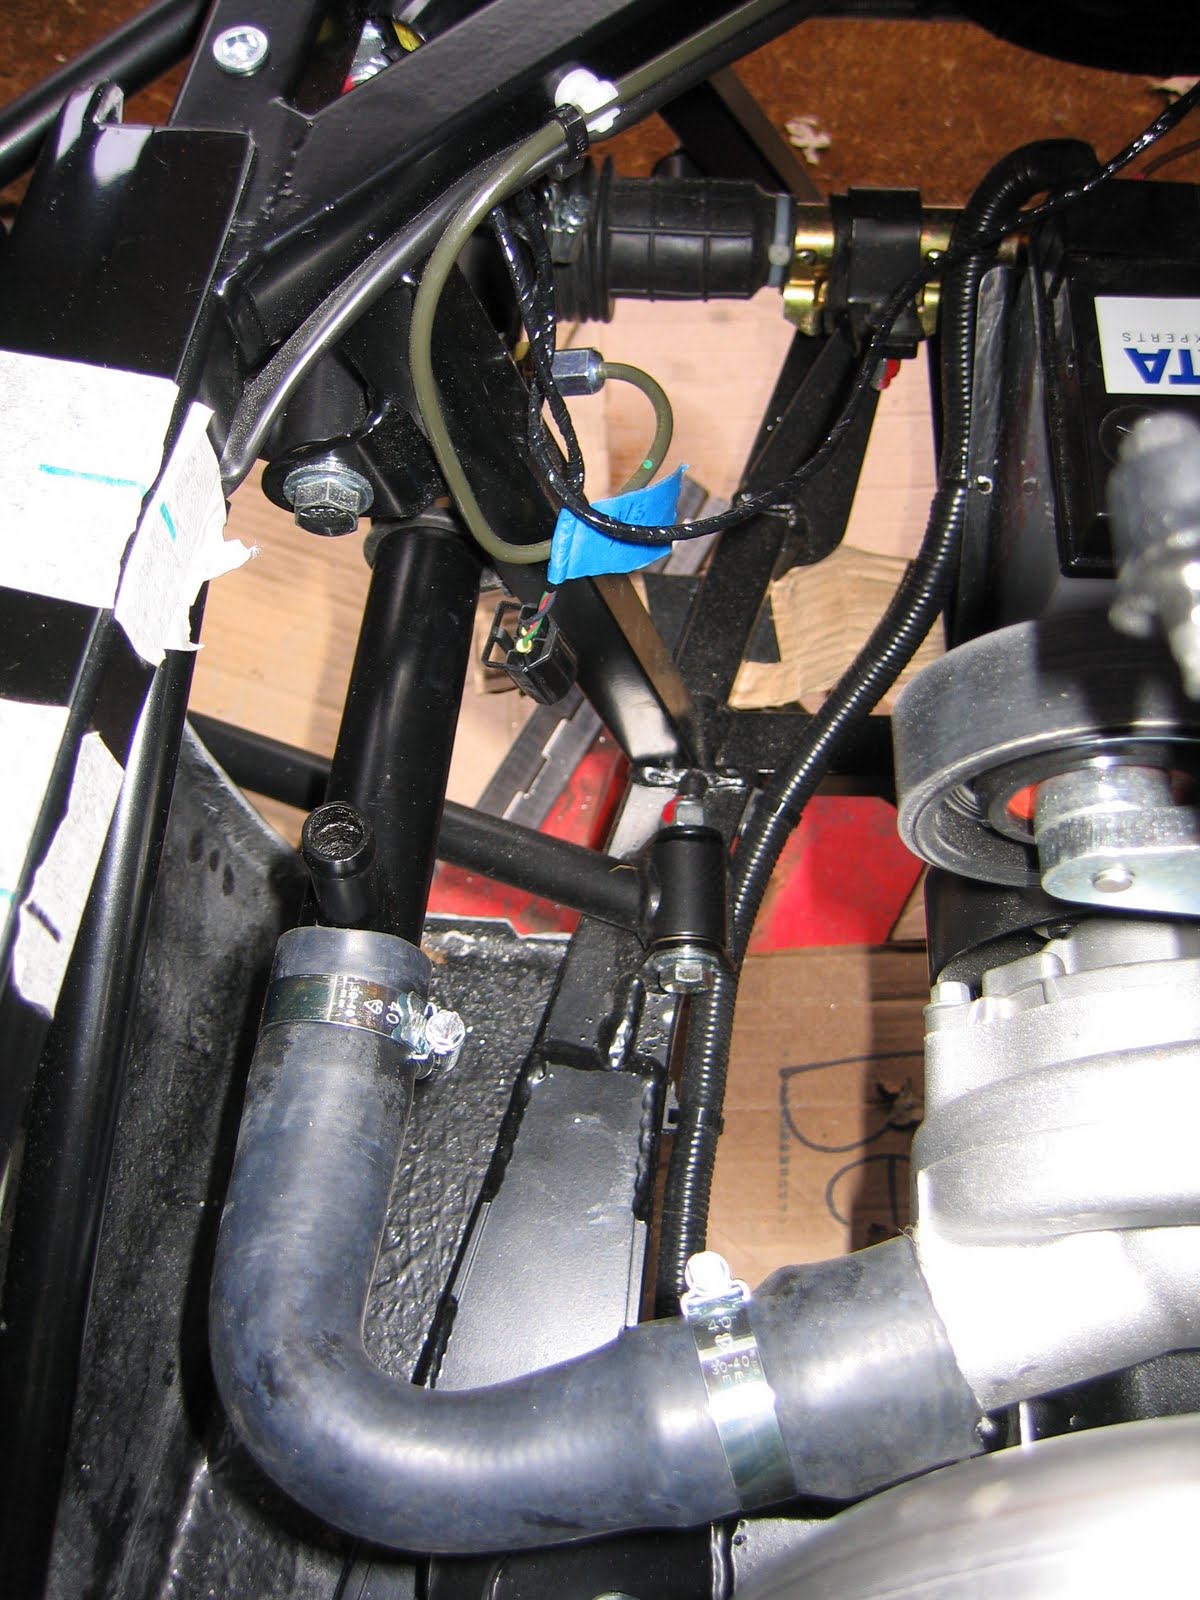
The last part of the engine installation was to fit the rest of the coolant hoses and the expansion tank.  I couldn't do this until the scuttle was fixed and the wiper motor installed because I wanted to locate the expansion tank on the near side rather than drivers side as per the manual.  The reason for this was to make the pipework a little neater and shorter.
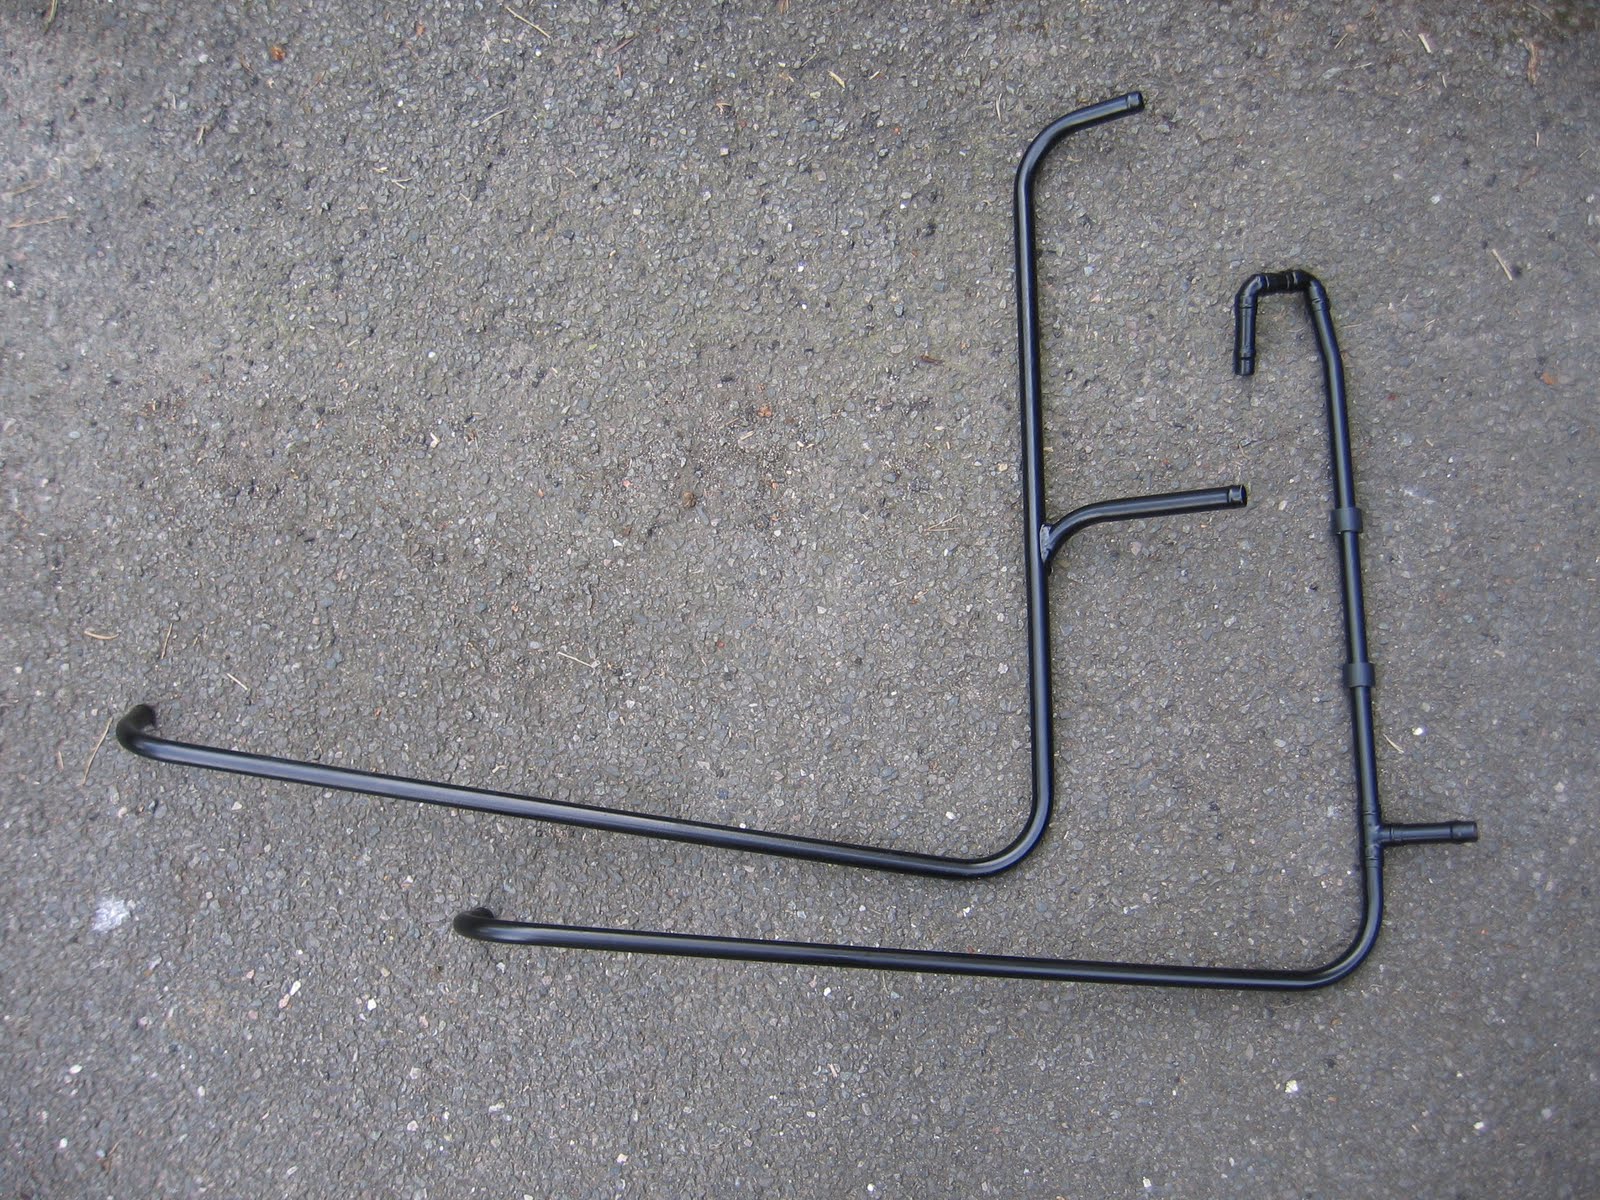
The standard pipe from the expansion tank has an outlet for the heater.  I don't have a heater so the instruction was to route the small bypass hose from the thermostat back into the top of the heater inlet.  This would have meant a pipe looping up across the scuttle ... not too neat.  I decided to move the expansion tank to the near side and then feed the small hose from the thermostat housing into the end of a new solid pipe and tee into this pipe from the expansion tank.  The pipe then follows the normal route to the bottom hose/water pump pipe. 
To do all this I needed to make up a new peice of solid pipe using some 15mm copper pipe a couple of 90degree elbows, a tee piece and some olives on the ends to stop the hoses blowing off.  I'd borrowed some pipe benders from Andy so set about the bending and soldering.  Here's my version of the pipe alongside the standard one ... you can see the standard one on the left with the heater hose inlet. 


And here's the version after painting.  I was very pleased with the results ... Andy will be proud of the solder work!

Installation was pretty easy ... I needed to add some spacers under the P Clips to raise the pipe off the scuttle.  I'm very pleased with the final result ... looks a lot neater than the standard setup I think.


Saturday, 10 April 2010

Windscreen Wipers and Washers

Fri 9th Apr 2010 - Work time = 1.5hrs ... Build Time To Date = 157.5hrs
Fitted the windscreen wiper motor and wiper mount boxes this evening.  All fairly straightforward though I was a bit nervous drilling the holes in the scuttle.
I also fitted the windscreen washer jet and tubing to the washer bottle pump.  I cable tied the tube onto the jet and pump ... the IVA inspector "blocks" the jets as part of test and I don't want the tube popping off.


Wednesday, 7 April 2010

Bodywork Fitting + Other Stuff

Fri 2nd - Mon 5th Apr 2010 - Work time = 22hrs ... Build Time To Date = 156hrs
Easter weekend ... Sandra and Amy in Cape Verde so lots of time spent in the garage! A long list of tasks completed this weekend:

1. Tidied up wiring to the rear lights, adding some cable tie mounts etc.  Whilst the rear body was off I drilled a couple of holes in the bottom for drainage ... the way the body is formed it looks like a big water trap!  I also added wiring for a high level brake light that I plan to install in the roll bar.

2.  With the rear body off and side panel off I bled the brakes again ... easier to access things without the bodywork.

3. Next more drilling of the bodywork ... this time the fuel filler.  Overall a fairly easy task but I took my time to make sure I got it right.


4. Attention reverted to the interior to fit the tunnel covers.  I decided to rivnut all these on so that it will be easier for future maintenance access.  I'll probably need to get the rear one off to adjust the hand brake at some point. The wire at the rear is one ofthe additional cables I ran when I installed the loom ... this one is intended to power the intercom and headsets.

 
5.  Bouyed with enthusiasm I set about fixing the bodywork.  First task to drill the holes in the scuttle to line up with the rivnuts in the chassis rails.  There are only 4 fixings for the scuttle ... I decided 2 more were called for, so added one extra one each side ... no chance the scuttle will fall off now!
I pretty much followed the manual for attaching the bodywork.  Attaching the rear arches was a bit tricky ... an extra pair of hands from Henry made things easier and he played a blinder acting as "trigger man" whilst I held the flexible drill attachment to drill the holes.  Ended up with 8 bolts attaching the rear arches ... more than the manual but it looks about right.  More rivets on the underside chassis rails and engine bay rails and then it was just a case of bolting down the scuttle.  Lots of silicone sealant around the scuttle ... there's a small chance it will keep some water out!


The car is starting to get bigger and there is less room to move around now.

6.  Next job to fit the strange shaped fillets in the rear arches and front bulkhead.  These are intended to keep mud etc from filling up the void between the bodywork and the side panels.  Prior to fitting the panels I filled the ends of the void with expanding foam ... I hate that stuff ... minor panic which I realised I had inadvertantly squirted some of it down the side of the car!  Thankfully it came off with no damage!!!


7. Whilst bleeding the brakes I noticed that the wiring around the throttle bodies was slightly fouling the throttle linkages.  I removed the trumpets and rerouted the wiring to the injectors and air/water temp sensors ... it was lucky I noticed this issue ... it would have caused a major problem later on.

8.  Next to fit the lamda sensor.  The sensor came pre wired with a 4 way waterproof AMP connector.  Unfortunately this would mean a huge hole in he bodywork to feed the connector through.  Anticipating this issue I had ordered a new AMP connector from eBay and it was a simple job to cut off the old connector feed the cable through a small hole in the body and fit the new connector.


Things progressing along nicely now though I'm still thinking I have another 40-50 hours work left.  In anticipation of continued good progress I downloaded the IVA forms to start reading up on what I need to fill out to book the IVA test !

Sunday, 28 March 2010

Bonnet fitting

Sun 28th 2010 - Work time = 6hrs ... Build Time To Date = 134hrs
Yes ...6 hour to fit the bonnet!  Well nearer 5 actually because I fitted the bottom hose as well.


The bonnet fitting took so long because I needed to grind aways some of the welds on the chassis so that it would sit down properly.  I also needed to file a little off the bonnet. 
The fitting of the hinge was tricky too ... I ended up rivetting the hinge to the bonnet and used rivnuts to secure to the chassis rail.
I hope all the other bodywork fitting doesn't take this long.


Exhaust manifold ... time to cut holes!

Sun 21st 2010 - Work time = 5hrs ... Build Time To Date = 128hrs
Time to cut the hole for the exhaust.  Using the template I made earlier I drilled out the glassfibre.
I then took my time to gently cut away the body work with the dremel sanding drum.  It took a long time ... as you can see by the work time recorded today.  There isn't a lot of room to insert the manifold in the engine bay .. it required a lot of twisting/turning and removal of the bodywork a millemetre at a time.  I was pleased with the end product.  It does look as though the hole is much bigger than needed when it's finally fitted but trust me it needed to be this big to wiggle the manifold through.

Rear lights and glass fibre !

Sat 20th 2010 - Work time = 4hrs ... Build Time To Date = 123hrs
Putting off the time to start cutting holes I decided to fit the rear lights.  The reflectors and stop/tail/indicator light clusters were pretty easy except for the connection to the loom.  There was no made up connector on the light fitting so had to work out the wiring colours and fit one of the 6 way connectors from those supplied.
It was a different matter for the fog and reversing light.  The light housing in the body was not very deep and the manual said the lights should be mounted flush and "bonded in".  I decided to make up my own fibre glass housings and fit the lights in these.  With no previous experience of fibre glassing this was a new venture!  It all worked out pretty well, though it was quite messy!


Sunday, 14 March 2010

Engine Wiring Completed + Other Small Tasks

Sat/Sun 13th/14th March 2010 - Work time = 7hrs ... Build Time To Date = 119hrs
A couple days of finishing off a few things following my visit to the factory and the advice from Mark.
First item ... twist round the injector connector on No 2 cylinder so that it didn't foul the throttle linkage.  Fairly easy task but needed to removing all the linkage to gain access.  Connected up the throtle cable at the same time ... now a fully functional throttle!


Next item ... connect up the coolant temp sensor to the webcon loom.  As suggested I removed the connector from it's fixing on the engine block and this thn reached the loom connection.  Just one issue the connector plugs were different!  Again another simple job that quickly became complicated.  Fortunately in the wiring loom bits there were plenty of spare connectors.

Third item .. replace the oil pressure sender with the one from the instrument set.  Had to partially destroy the old one so that I could get a socket on it to undo it  There was also no room to get a spanner on the new one to tightem it so it was a lot of brusied knuckles to get it hand tight.


Item no. 4 ... relocate the clutch cable in to clutch arm. I decided to follow Mark's advice and remove the grommet so the cable sits in the lower part of the arm and has a straight feed to the adjuster.  Aso put a cable tie in to tidy up the clutch cable routing round the engine mount.


Next ... connect up the fuel lines to the carbs

And the final bit of the engine work ... install and connect the Water Temp gauge sender into the thermostat housing.

Next step ... ran a wire from the rear brake lights so that I can fit a high level brake light in the roll bar.  Just hope I identified the correct cable from the loom! 

Torqued up the rear suspension whilst I was there too!

Attention now turned to gettng the bodywork fitted ... at least starting to get it fitted.  The sides were not sitting quite right and didn't hook down under the floor very well ... actually it seemed a tight fit and i didn't want to force it.  I made som clearane holes to clear the rivnut fixing for the scuttle and that seemed to give enough clearance and the sides popped into place (with a bit of creaking which was slightly disconcerting!).  The scuttle needed some cutouts to clear the wiring loom grommet where the loom goes to the ECU and also the steering column.  With all that complete it seemed to line up except for the bonnet fouling on the lower wishbone bolts at the front.  A job for another day. 

Starting to run out of jobs now so next weekends job will be to start cutting holes in the bodywork for the exhaust and fuel filler and seat belts.  Not looking forward to this ... keep reminding myself ... measure twice cut once!

Saturday, 6 March 2010

Collected Body, Carpets, Seats ...

Fri 5th March 2010 - Work time = 0hrs ... Build Time To Date = 112hrs
Another "white van man" day ... collected all the remaining bits fom Westfield today.  Got off to an early start, leaving home at 4:15am and managed to get to Westfield at 8.  Spent some time with Mark to get some answers to my earlier questions:
1. No2 Injector needs to be swivelled around to clear the throttle linkage (may also need to remove some of the metal on the linkage) otherwise linkage is in the correct place.


2. The Coolant Temp sensor needs to be unclipped from the engine ... then it should be OK to reach the wire.
3. The oil pressure sensor needs to be swapped with a new one in the instrument pack

4.  Clutch cable can be in the top hole on the clutch arm with the grommet or lower hole without the gromemet.  Mark recommends the later.

Got back home and unloaded the van by about 1:30 ... most of the body panels had to be put loosely on the chassis ... the rest of the bits up in the attic.

It's starting to look a little like a car now ... oh and Sandra approves of the colour!
 

4 Wheels on my Wagon!

Sun 28th February 2010 - Work time = 2hrs ... Build Time To Date = 112hrs
Connected up the Clutch cable ... another straightforward job you'd have thought but it was not quite that way.  The clutch arm had a rubber grommet in it and from the way it was shaped it looked like it was meant to go round the end of the cable and position the cable in the upper part of the hole.  However the narrow part of the hole was at the bottom and this is where the cable was supposed to go. With the cable in the grommet it was not properly aligned with the cable adjuster so not sure that is right.  After much head scratching again (difficult when lying under the car!) I opted for using the grommet and leaving the cable in the top hole. Will check with Westfield when I'm there at the end of the week.

Time for a milestone moment ... put the wheels on and lower it off the chassis stands.  Amy summed the up the occassion with an "It's awesome Dad!"