Sunday, 8 November 2009

The art of pipe bending ... part 2

Sunday 8th November - Work time = 3 hrs ... Build Time To Date = 29 hrs
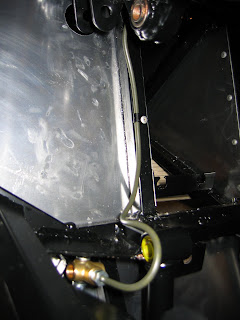
Today was the front and rear brake pipes.  The pipe fixings were the push-in clips rather than the rivet ones for the other pipe runs.  These were a little fiddly to put in but with a spare piece of brake pipe installed they tapped in easily with the mallet.  The pipe runs were fairly easy to bend, clipping into the pipe clips along the way.  I didn't complete the bends at the front until the flexible hoses are installed as I figured they would get damaged if left just hanging there.  Here's the finished view ... note the masking tape over the ends to stop any muck getting in!


Hi, it's the missus here, just want you all to know that the printer needs fixing, the computer most probably needs looking at as it keeps breaking but it's ok because we have brake pipes installed!!! No, seriously I'm OK with it!!!

Looks like I'd better go fix the PC and printer now !  ;-)

Saturday, 7 November 2009

The art of pipe bending ... part 1

Saturday 7th November - Work time = 6 hrs ... Build Time To Date = 26 hrs
Time to start installing the pipework ... something I was not looking forward to!  I had spent many hours researching this area of the build, checking build photos and studying the manual so I felt well prepared and had the routes well planned ... little did I know! 
The plan was to route the fuel pipes along the edge of the floor in the transmission tunnel and the rear brake pipe in between the two fuel lines.  So, confident of my plan, I started with the twin fuel pipes.  Out with the pipe bender (on loan from Graham) and I quickly formed the "swan neck" bend at the front ... closely followed by the bend back into the transmisson tunnel and then the splay out at the rear ... heh this is pretty easy.  Like others I decided to fit the rivets on the pipe clips from the inside/out so that the "bumps" were minimised on the interior.  I put some small washers on the outside to spread the rivet better and called upon Henry to add the extra pair of hands to pull the rivets while I held the fixing and washer in place.  So far so good.


Now to the brake pipes ... start small me thinks so I start with shortest piece from the master cylinder to the "T" piece with the brake light switch.  I formed the various bends around a couple of pieces of 35mm waste pipe and 25mm chrome towel rail I had lying around the garage.  With my growing confidence I started on the the front to rear brake pipe.  It was a tedious slow process ... temporary fixing the pipe at the front, marking where to bend, taking out the pipe, forming the bend and back in again to work out the next bend.  45 minutes later I had the pipe roughly formed.  At this point I had my doh! moment.  Whilst the brake pipe would fit very neatly between the fuel lines, there was no room to drill the fixing holes and rivet the "P" clips in place.  15 minutes later having considered various options including drilling out the fuel line rivets and starting again, I decided to route the brake pipe alongside the lower fuel line, fixing it to the braces across the transmission tunnel.  The pipe was still against the side of the tunnel and well secured so it seemed the best option.  Unfortunately this meant that the bends I had made at the rear were no longer quite as neat as I had originally hoped but there was no way I could re-form them.   Here's the finished views ... despite the minor issue I'm quite pleased with the results.


Earlier in the week the missing bits for the brake pedal arrived so I decided to finish that off before starting on the rest of the brake pipes.  What should have been a 5 minute job turned out a bit more complicated.  Having fitted the missing part and setting the pedal up to align with the clutch pedal it was clear that the push rod was fouling the rear of the brake pedal. 


So time to dismantle things again and cut off some of the thread on the push rod.  I managed to do this without needing to remove the master cylinder.  Here's the how the finished pedals look (without my finger holding up the brake pedal!).


One final job for the day ... I treated myself to an early Christmas pressie and bought a 4 drawer tool chest from Halfrauds ... it was a 1/3 off plus 10% discount for online order so I couldn't resist the bargain.  Here it is .. pride of place in the garage!


Friday, 30 October 2009

Pedal power ... time to use some spanners!

Friday 30th October - Work time = 2 hrs ... Build Time To Date = 20 hrs
Day off work today (well most of a day off ... lots of work "distractions" still!) so I spent a couple of hours fitting the pedals.  Earlier in the week I checked all the parts required and noticed I was missing the metal fitting that attached brake master cylinder push rod and the clevis pin on the brake pedal.  A quick call to Westfield and they said they'd post a new one to me.  Then Royal Mail decided to go strike again so god knows when it will arrive.  Undeterred I carried on ... pleased at last to be actually bolting something on. 
Here is the finished article ... for those of you unfamilar with these things my finger is strategically placed to indicate the brake pedal (and stop it falling down in the picture as it is not attached to the master cylinder pushrod!).


Now to get some pipe bending training from Andy!

Sunday, 25 October 2009

A quick turnover ... floor now fitted

Sunday 25th October - Work time = 3.5 hrs ... Build Time To Date = 18 hrs
As I mentioned yesterday I planned not to fit the off side exterior panel until after the pedals were fitted.  However I decided to drill the chassis in preparation as it would have been difficult to clamp it in place once the floor was fitted.
Then it was time to turn over the chassis to fit the floors.  Henry is climbing in France so had to enlist Amy  and Sandra to help with the lifting.  As it turns out Amy did most of the lifting at her and Sandra's end!
The floor panels were pretty straightforward so here is the completed underside.


Henry is back on Tuesday so I can turn it back over and start to fit some real stuff ... the pedals !

Saturday, 24 October 2009

Yet more drilling ... but finally it's time to attach bits

Saturday 24th October - Work time = 8.5 hrs ... Build Time To Date = 14.5 hrs
More drilling for the interior panels today.  Started off with the rear bulkhead ... I was not looking forward to this as I had read on several forums how difficult it was to get it fitted due to the need to bend the panel.  I flattened the top bend a little in the middle, masked off the interior rails so I didn't scratch them and after that it was pretty straightforward to bend and slot in.  Here's another "hedgehog" shot showing the panel drilled and rivets in.


I continued with the near side exterior panel and also the scuttle.  I decided to leave the off side exterior panel until after I'd fitted the pedals as access would be easier with it off.

At last the time had come ...I could now change to fitting and rivetting instead of drilling.  First on was the back panel, closely followed by the tunnel panels.  The lazy tongs rivetter made things a lot easier once I'd worked out the how to eject the spent rivet shanks.  However there were many places where it wouldn't fit so I had to resort to the traditional hand pull rivet tool.  Fair play to other Westfield builders who only use a hand pull rivetter for all the build rivets ... they must have a stronger grip than me!

So finally some pictures where I have added something to the chassis ... demonstrable progress at last.


Spurred on by the sense of achievement I continued with the front bulkheads.  I thought it best to put some washers under the rivet heads on the fibre-glass clutch pedal panel to spread the load a little better.


Finally it now looks like I'm making some progress ... not a huge amount to show for 14.5 hours effort though !

Sunday, 18 October 2009

More drilling ... the chassis is now resembling a colander!

Sunday 18th October - Work time = 4 hrs ... Build Time To Date = 6 hrs
I decided I would trial fit all the panels and drill the holes ready for final fitting before I secured any of the panels.  This allows me full access for the clamps and drilling.  So today I drilled holes for the offside inner tunnel, front bulk heads and inner front bulk heads.  Lots of panels required some "dremmel fetteling" but apart from that no issues. 
Here is the fibre glass inner bulk head with clutch foot rest moulding.


So 6 hours in and all I have managed to do is drill the chassis full of holes and I am still to trial fit the scuttle and exterior side panels.

Saturday, 17 October 2009

Let the Build commence ... this could take some time!

Saturday 17th October 2009 - Work Time = 2hrs  
Having spent last weekend sorting out all the boxes and nuts, bolts and rivets it's now time to get started.
I read the manual again ... I can no recite almost every word! ... and decided start with the nearside inner tunnel panel.  After clamping the panel in place it was obvious that the seat belt mounting holes were not quite aligned. 


Time for some fettling with the trusty dremmel before reclamping back into place and starting to drill the holes.  No real issues with anything but the 4 holes at the rear were difficult to reach.  I needed to use the flexible drill shaft to access the holes.  At this point I called upon my daughter to operate the drill trigger whilst I held the drill bit ... way to go Amy!


Here is the obligatory "hedgehog" shot with all the rivets in place ... I put them all in to make sure I hadn't missed any holes. 


Out with the panel again to debur the holes.  At this point I realised that I had spent 2 hours working on this and I haven't actually fitted anything yet!  Somehow I think this is gonna take a long time!

Sunday, 11 October 2009

Kit Collected ... lots of boxes full of unknown bits!

Friday 9th October
We leave Cricklade at 6am for the 1.5hr trip to Westfield allowing time for the mandatory truckers breakfast en route.  Arrive at the factory just after they open at 8am.  More reversing required into the loading area ... this time with no incident (I'm starting to get used to this!).
The guys then start loading the van ... hmmm seems like a lot of boxes of car parts, most of which don't look very familiar! 
Meanwhile armed with camera I start taking pictures of a part built car covering all angles, pipe routes, wiring etc. on the basis that it might be a good reference for my build.
The loading took a couple of hours so we were back on our way just after 10am.  The trip back home was pretty quick with no major hold ups. 
Time to unload ... 
                                          we filled this ...


... with the contents of this ...


... and ended up with this (plus a lot of boxes in the loft!)


Now where is that build manual?
  

Collection day minus 1 ... collect the van

Thursday 8th Oct
The van rental company phone to say the LWB Luton with tail lift that I had booked is damaged and I can't have it but offer a Merc Sprinter instead.  Quick call to Westfield confirms that this should be OK still so first potential issue overcome.  I collect the van at 4:30pm and set off to drive to Cricklade, Wilts ... Andy my brother-in-law is helping me collect the kit tomorrow so we are setting off from there to Westfield early doors on Friday.  The "white van" driving in pretty straighforward and the van lives up to it's sprinter name along the M4. 
Second potential mishap overcome when I reverse into my sisters drive and nearly demolish next doors garage ... the van is deceptively long and her instructions weren't clear!

Saturday, 22 August 2009

Collection date confirmed ... now to buy some tools

Westfield have confirmed the collection date for the chassis, engine, etc. It's the 7th-9th Oct ... only 6 weeks to go! I'd better start getting all the tools that are missing from my toolbox.
To that end I've just ordered a 1 tonne engne hoist off of eBay closely followed by a lazy tongs rivet gun (I don't fancy pulling all those rivets on the body panels with my existing rivet gun).
I collected a set of Westfield build stands from a work colleague who is progressing well through his MX5 SDV build (see his blog at http://westiebuild.blogspot.com/) and he was kind enough to lend me a brake/fuel pipe bender too.
Now attention must turn to tidying the garage!